Posts

Showing posts with the label scripting

Right Module then shell

Image
 Finally we have made it. Here I will check we have the right module and then I will get my shell. Again remember these are just notes and not all of them. But if you see something and you know of a more effective way I am always up for hearing and learning new things  So, line 4 we eventually get rid of but one thing to note is that on line 6 when type it into the script we are typing it backwards and only 2 characters at a time. Now I am sure there is a reason, and it is significant, but the course did not go into it. Here I am copying the payload after it was created.  Now we add the payload to the script.  This is the remainder of the script. Run this and we have completed the objective.  Feel free to reach out on  LinkedIn  or  Twitter  
Offset

Image
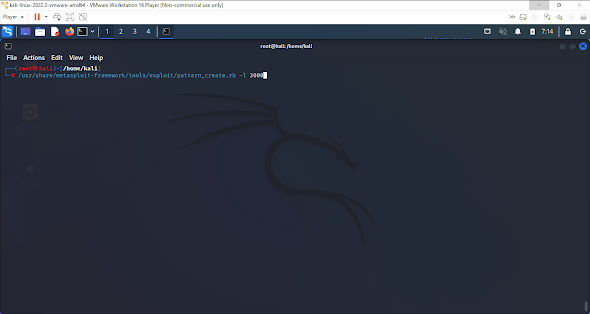
What I am doing here is finding the offset. Again this is all enumeration for the end attack. The more information we have the easier it is to overload this machine.  Remember to run vulnserver and immunity debugger as Admin and attach them. And here we are using the number of 3000, why is that. Well if you remember in the last blog the tipping point was 2900, so now we are ensuring enough characters will be used.  We get this printout and we are going to copy it to put in our script. A few things to note. We no longer need the time so we erased that. We set our "offset" to what we just copied and pasted and we are no longer using a while loop.  I took this picture to make a point. Make sure you copy the characters exactly. I had a single space after the last "9" and it messed up my whole script. So we removed the space, ran the program and as you can see we achieved overloading it and its paused.  Now in a very messy was I have highlighted the important part here. ...

Spiking and Fuzzing

Image
 Here we started getting an introduction to some new tools. Using vulnserver, and immunity debugger. We did this as an introduction to exploit development. So the first thing you need to do is go out and download both vulnserver and immunity debugger. Now that you've done that run both vulnserver and immunity debugger as administrator  Then attach vulnserver to immunity debugger and press play. Make sure in the bottom right it says "Running" Here we use "nc" and "-nv" with the ip address of the target server with a port of 9999 to gain access and then we used 'HELP" to print out all the valid commands. Here we use the command "generic_send_tcp" with our ip address and por 9999 and trun.spk. Now to be honest I dont 100% remember what the following2 zeros are for as this was a few weeks ago and like many people I dont remember every single detail (hence the screenshots and this blog) And here you see its paused again because we have ju...

Sockets, Hydra and My very first port scanner

Image
 So we touched on Sockets on briefly, but we built our first port scanner. Now I decided to try both the 50-85 like the lesson taught then I went back and scanned all of them just out of curiosity. Let me tell you it took a while with as little processing power as my laptop has. But it was a fun lesson.  Socket above and Hydra Below Then below here is my first port scanner Feel Free to reach out on  LinkedIn  or  Twitter

Manual Exploitation

Image
 Now this was a little misleading when they said this. I thought we would be going out and brute forcing or something like that. But instead, we used hydra and Metasploit to manually gain root access to while I expected more it was still really cool and let's face it we all should be using the tools out there. I mean it's always good to have a base knowledge of how to do it if the tools become unavailable, but tools are there for a reason. One of the biggest aside from convenience is consistency. This ^ is the hydra code. And this ^ is me gaining root access again. Feel free to reach out on  Linkedin  or  Twitter

Dictionaries

Image
 This is my notes on dictionaries. I found this a fairly straight forward code.  Feel free to reach out on  LinkedIn  or  Twitter  

Functions in Python

Image
 Here are my notes from the functions lesson of the PEH. I think this was a fairly easy lesson to follow along with. My biggest take away I think is the importance of the indentation. As well as the fact that you can have single or multiple parameters. And as a reminder the '#' on the right-hand side of the code are my notes for later. I have always like keeping shorthand reminders that call back things rather than long drawn-out notes. But if you need any clarification please comment or message me on my social medias and I will try and elaborate.  Remember feel free to contact me on  LinkedIn  or  Twitter

Advanced Scripting

Image
 In here we learn a few different things, now this is not a developer course so when I say advanced, I am meaning like advanced beginner. We are not trying to code whole programs. We are simply trying to get exposure to some more advanced techniques that may come in handy while trying to find vulnerabilities in a system for a client. Here we see how to pull letters from a word, pull a word from a sentence split a sentence, join that sentence (and yes I know I spelled it wrong in the program....still worked in the end lol), how to section off part of your sentence to be able to put quotation marks in your sentence, we learn how to search for a letter in a word but also how to look for the letter no matter if its upper or lower case and how to insert a word into a sentence.  Please reach out on  LinkedIn  or  Twitter

Looping

Image
 Looping was pretty self-explanatory and very similar to what we did in bash. So we did for loops, now if we remember and for loop runs from the start to finish of a loop. But we also did a while loop, which continues to execute as long as something is true. Now I got a little ahead of myself and I am going to show you and then I will post the finished correct loop. This is a pretty simple one where it printed the name of the veggies.                             Now can you see the mistake here? I wanted it to print 1,2,3,4,... to10. But I told it to print 1. Now what I thought was worth noting and interesting is that it still only counted to 10 and then stopped. SO just because I had messed up and it didn't print the correct numbers it still ran properly. And this is the correct way, this ended with it printing 1,2,3,4,... As always feel free to reach out on  LinkedIn  or  Twitter